
A virtual tour is a type of semi-immersive VR technology that enables you to digitally visit a certain venue. The idea is to depict a real location in a simulated environment that allows you to experience the place as if you are already there.
Typically, a virtual tour is created by transforming a 360 seamless panoramic image into a functional Equirectangular 3D space. You’ll be able to spin the screen 360 degrees in all directions and you’re going to be able to switch from one scene to another.
Virtual tours have recently gained immense traction in a variety of companies thanks to their high potential for engagement with prospects. And while virtual tours are a powerful marketing tool, many agents avoid them because designing them can be time-consuming and costly. But armed with the right steps and the right tools, it’s entirely possible to create a virtual tour.
1. Choose the Proper Gear and Software

One of the reasons many agents avoid virtual tours is because they imagine that they require complex, high-end photography equipment. In truth, you need a panoramic or 360-degree camera that is more affordable and user-friendly than ever before. You should consider buying one to create virtual tours on a regular basis. Choose a virtual tour software vendor and evaluate whether they sell their own cameras and lenses or discounts to buy a camera.
Take a look at in-depth reviews of the best 360-degree cameras on the market; compare costs, specs, resolution depth (higher is better), stabilizer options to avoid blurred images, battery life, and remote operation. Purchase or rent a camera that gives you the functionality you need for the kind of virtual tour you want to make.
2. Visualize Your Shots
Create a list of the places that you want to include in your virtual tour. Walk around each space, locate the middle, and make sure your camera is able to catch and highlight the features of each area from that vantage point. If the center doesn’t work, find a location where the camera picks up the most detail and mark the spot with a piece of tape. Create a shot list by adding the name of each space or filling in a pre-printed shot list template.
3. Stage Each Room
Now that you know where you’re going to set the camera, you need to make sure the space looks as perfect as possible. Remove anything that stands in the way of the lens, ensuring that the camera has a clear view of the whole area. Take anything out of the space that could make it look dirty or deter customers from high-value features. The clearer the point of view, the better the end outcome. Make sure the room has enough light to make the features clear to see.
4. Ensure Your Tripod is at the Right Level
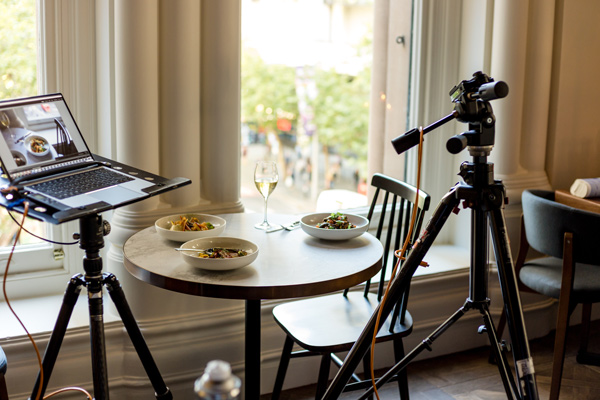
Your tripod must be level to ensure images are uniform. This applies to any photograph, video, 360-degree, or panoramic picture you might take. Don’t try making panoramic or 360-degree pictures without a level spot to position your camera—otherwise, the lines and angles in your shots won’t be straight. If your tripod doesn’t have an included bubble level, you can download a leveling tool on your smartphone. Level the tripod, adjusting the legs so the bubble is balanced between the lines.
5. Take Some Test Shots
You should test each of the shots on your image list and make sure that you highlight the features you want the buyers to see. Take a test shot in your room and review it. If the room looks too dim, add more lights, or make changes to compensate for this.
If you see something distracting in the frame, move the camera or position the objects in the room accordingly. Be sure to keep an eye on your mirrors, glass, or windows to make sure that you and your camera are not mirrored in the images. If you do, take another spot to stand while you remotely control the camera.
6. Take All Photos on Your Image List

When you have decided on the right camera settings, you will be ready to move into each area on your photo list and take photos. Find the place that you have marked in each room, set up your tripod, and take pictures. Check each image on the camera screen before moving the tripod, grab the shots as appropriate, and ensure that you have all the photographs you need before moving to the next room. It’s better to get too many pictures rather than too few.
7. Create Your Virtual Tour
If you have all your images, create your virtual tour by sewing the images together using the program you choose in the first step.
Upload your photographs to your software application to build your virtual tour. When prompted, go through the process of inserting static or panoramic images. The app can pair static photographs for 3D simulated tours and arrange panoramic pictures for 360-degree tours.

You can add features to most applications to enrich the viewer’s experience. This can include audio descriptions, immersive links to hotspots, music, or text. Depending on the app you chose, select the Settings button or the Edit button to choose new features to add to your virtual tour. Viewers will be able to quickly back up, zoom or change directions with their mouse until the virtual tour is complete.
8. Share Your Virtual Tour
When you’ve completed making your virtual tour, your preferred software will provide a link to your tour that is saved in the cloud. You’ll also get a code that allows you to add a tour to your websites or social media pages.
Wrapping up
Now, without any professional help, you should be able to build your own virtual tours. Take advantage of the tech at hand.
Go ahead and start using virtual tours to get your business to the next level. Engage and connect with your prospects on your website and see them turn into valuable customers.