Introduction
Whether you are finishing up on an important project or consuming media for entertainment, slow internet speeds can be frustrating. The first thing most people do is restart their WiFi routers or their personal devices. But, what happens when none of that seems to resolve the issue? There are several variables that determine internet speed including the quality of hardware, malware, router location, etc. While such factors are rare and generally get resolved quickly, the type of DNS server might just be the problem. In this article, I’ll take you through the basics of DNS servers and how to navigate the system to land the best DNS setting for faster connections.
What is DNS?

Domain Name System is the internet’s phone book if you may. Computers strictly communicate in numbers. Every graphic and text you see online is backed by a set of code that gets translated into human-friendly content. To make it easy for users to find pages, DNS servers maintain a list of page names along with respective IP addresses. It’s from these addresses that your device discerns a page you are searching out of billions of others. For instance, a domain name like google.com represents a set of corresponding numbers, dubbed IP address, in this case, 191.255.66.102.
How does DNS Work?
When you search for a website online, say y.com, your device sends your query to a server that should return the site’s address. Under the ordinary arrangement, this first server, called a resolver, is operated by your internet service provider and contains a catalog of millions of addresses. When your search is not available here, the resolver forwards the same to another server, the root server. While this server does not contain actual addresses, it communicates with Top-Level Domain servers(TLD) which store specific domain addresses like .com, .net, .org, etc. Once the IP address is found, the information is routed back to your device to land on the intended page. An Authoritative name server is the last resort when your query has not been found elsewhere.
DNS and Internet Speed
Sophisticated tech aside, note that every transfer from one server to another costs time and thus speed. This initial stage renders other aspects of your context irrelevant until you have found your destination-an IP address. While ISP-operated DNS servers are located near you, they still offer the slowest speeds due to the following factors:
-
- Heavy traffic: all users channel requests to the same server slowing down the processing speed.
- Inefficient software: stock software is poorly optimized for queuing and routing queries.
- Limited storage: they rely on subsequent servers to access the growing number of IP addresses.
This unreliability is not without a fix. The majority of ISPs allow for third-party DNS service options on their networks. These are high performance, parallel, well-optimized DNS servers that offer faster results. They achieve this by using CDN( Content Delivery Network) services to attach location information to queries. This allows your requests to be routed to a server nearest to your location. The following are examples of free third-party DNS services:
-
-
- Google Public DNS
- Cloudfare DNS
- Quad 9
-
Google Public DNS is the most popular in this category and offers decent speeds. Cloudfare DNS offers comparable speed and better security by minimizing the level of exposure of your internet activity to your ISP, hackers, and spies,
How to choose the best DNS for your case?
Ultimately, you need to compare the speeds of the different DNS options you have to pick the best. This can be tedious when done manually by trial and error. Therefore, I’d recommend any of the following DNS bench-marking services:
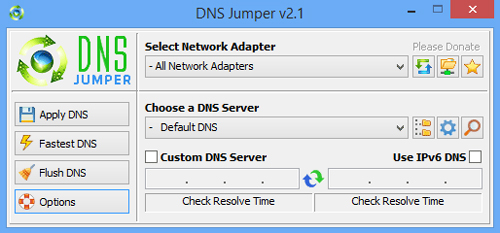
1. DNS Jumper
2. Namebench

3. GRC Domain Name Speed Benchmark

How to change DNS settings on your device?
Once you pick the fastest DNS, it’s time to shift your connection. Follow the subsequent instructions to change the DNS setting on these platforms:
*For the sake of redundancy, DNS addresses often come in pairs and you must enter both in their corresponding fields.
Android
-
-
- Go to setting > WiFi > select your current network
- Long press on the network > select modify network
- Check the advanced options box to reveal more settings
- Change IP to static and enter the DNS addresses
- Tap Save
- Disconnect and reconnect to the network to update settings
-
Windows
-
-
- Click start > control panel > network and internet
- Click “change adapter setting” and right-click on your current WiFi network, bearing its name
- Chose IPv4 and select its properties. Click on” Use the following DNS addresses and
- Based on the bench-marking results, feed the server address into the alternate and preferred DNS server fields
- Click OK
- Disconnect and reconnect to the network to update settings
-
Mac-OS
-
-
- Click System preferences > Networks > Advanced options
- Navigate to the DNS tab and click the plus sign
- Enter your preferred DNS address
- Click OK
- Disconnect and reconnect to the network to update settings
-
iOS
-
-
- Tap setting > WiFi network > tap your current connection to open its setting
- Tap configure DNS > select manual
- Delete the current DNS bu tapping the – sign
- Select Add new DNS
- Tap the + sign to enter your preferred DNS address
- Tap Save
- Disconnect and reconnect to the network to update settings
-
Conclusion
I hope you have better connectivity now. If the problem persists, kindly forward the same to your ISP’s customer support. Cheers.