What are Gmail filters? No, we’re not talking about those image enhancements on Instagram or Facebook. Filters in Gmail are literally filters, like a funnel that redirects emails to wherever you designate them in your inbox. It’s an efficient way to manage emails instead of doing things manually.
For example, you can redirect personal emails directly into a Personal folder, and newsletters into a separate folder so they don’t mix up. By weeding out emails this way, you can free up space, get rid of clutter, and focus on emails that really matter.
How to Create Filters in Gmail
The best way to launch a new Gmail filter is to click the search box at the top of the Gmail website and then enter whatever you choose to use as the filtering basis—a term or phrase that may occur inside the topic or body of an email, the address from which a message may come, or any other element you want.
When you start typing, you’ll see a small, downward-facing arrow on the far right side of the search box. Click on it and just like that the first filter-related type will emerge.


Gmail Filter Tips
To-dos
This is a widely used feature, but you can email yourself the things you need to do, and then set up a filter that has your email address in both the “to” and from” boxes that uses the to-do label to the message. This will allow you to see all your to-dos in one filter.


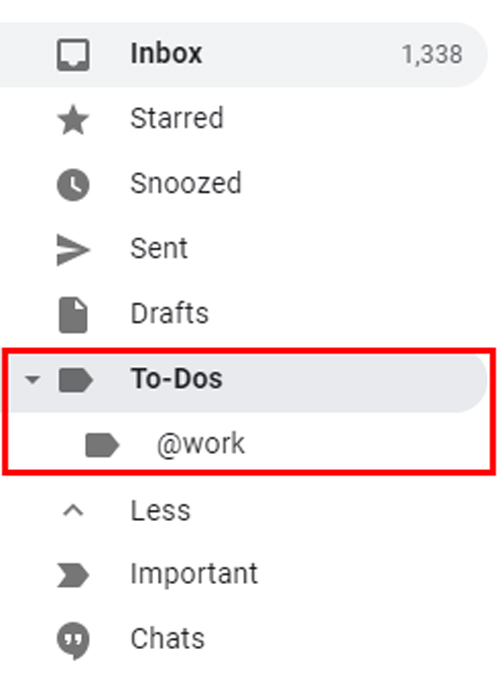
Or if you’re a GTD fan, you might set up to-dos for each background (@work, @home, @errands, @phone, etc.), by creating separate labels for each and then set up filters for different email addresses. Email yourself to your name+work (you don’t need the @gmail.com part) and set up a filter to label the “@work” address, and so on for each context.
Remove Old Sent Emails
In most cases, there is no need to keep your very old emails sent. Please delete them. Create a filter with “before:2006/06/01 label:sent” with “Delete it as an action (you would need to press “OK” in the Gmail alert dialog). Check the date of this filter every month or so.

No Delete
Any emails that you don’t want to delete—those precious ones from your kids, for example, or maybe from your manager. Set up a label (“nodelete”) and a filter that places the nodelete label on the emails from the address you want.
Now, apply the string “-nodelete” to some of the above filters so that it doesn’t reveal these emails. Now you can delete your old emails or attachment emails, for example, without fear that your children’s or boss’s emails will be trashed along with the rest of the rabble.
Send Spam to Trash
Instead of Gmail-filtered spam heading to your spam folder (and making an irritating count of unread spam in the folder name), set the is:spam” filter in the “has the words” area (just press “OK” on the Gmail alert dialog when you click next and “Delete” as the action. All spam messages are now in the trash.
Follow Up
Even if you’re not a GTD fan, it’s a must to have a follow-up label. Simply set up a filter with an email address such as “youname+follow” and place it in the “has the words” filter field, and use this filter label to “@follow” and skip the inbox. Now, anytime you send an email that needs to be followed up, add your name+follow in the “bcc” area and it will go to your “@follow” label. Be sure to scan this label once a day so that you can keep track of your emails.
Attachments

If you’re like me, you like to get through your old emails and remove a lot of them at a time. During the cleaning process, I do typical searches, such as “has:attachment,” so I can look at all my larger emails and remove them. Make this method easier by making a label and filter for this search, and all of your common searches, for that matter.
Archived Bookmarks
If you use del.icio.us and other bookmarking services, you can archive all of them on the Gmail label (“bookmarks”). Get the feed URLs for each of your bookmarking services, enter them in a forwarding tool such as rssfwd.com, and then set up a filter to identify all the bookmarks. Now all of your bookmarks are in one location, with Gmail’s great search.
Backups
Create a second Gmail account for storage and create a filter to automatically forward any attachment emails (“has:attachments”) to that second address. You can now delete your old emails without any remorse or concern.
Bloggers
If you’re running a blog, you can conveniently store and mark all your blog messages and pingbacks (“blog”), so your inbox won’t be filled up easily. Also, get your blog stat reports mailed to you and stored to this label, so you can take a quick peek at the progress of your blog at a glance.
Killfile
If people send me so much junk mail (jokes, chain mail, etc.), they’ll be attached to my killfile. It’s a basic filter that looks at the “from” field and deletes a message if it’s one of the addresses that I’ve added to the filter. Now and then I’m looking to attempt to add someone to my killfile, I simply open the filter and add their address.
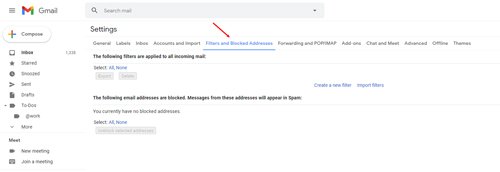
Managing Your Gmail Filters
Always ake a mental note if you ever need to change the filters in the future: if you want to edit, remove, or even just revisit the filter you’ve built, just click the gear-shaped icon at the top right corner of the Gmail website, click Settings then click the “Filters and Blocked Addresses” tab at the top of the Settings page. You’ll see every filter you’ve ever built there, and you can tweak or delete all of ’em with a few quick clicks.