
You can easily use Word to make greeting cards for all occasions. Microsoft Word is capable of much more than just creating reports and resumes. It includes a capable range of design tools to assist you in creating graphic-enhanced documents such as greeting cards.
In this Word tutorial, we will make a greeting card from scratch to demonstrate how simple it can be for everyone.
How to Create a Greeting Card with Microsoft Word
Before you begin designing a greeting card in Word, you must first determine whether you want it flat, like a postcard, or folded, like a Hallmark card. Greeting cards are also available in a variety of shapes and sizes, ranging from A0 (84.1 x 118.9 cm) to A10 (2.6 x 3.7 cm). These decisions will influence any subsequent design decision.
1. Open a Blank Document
Open Microsoft Word and create a new document. Fill in the blanks with your own ideas about what a greeting card might be. Images, shapes, text, Word Art, and even 3D models can be added.
2. Set Up Orientation and Layout
Greeting cards are usually set out in landscape orientation. Landscape mode is also better for images.
To switch from portrait to landscape mode, navigate to Ribbon > Layout > Page Setup Group > Orientation > Landscape.

In the Page Layout Group, select Size to select one of the regular sizes from the dropdown. You may also use a custom scale by selecting Paper Size from the drop-down menu at the bottom.
If you want the picture to fill the entire page, use the Margins tab in the Page Setup dialog to reduce the margins.
3. Balance Everything with Gridlines
There is no need to stuff your document. White space aids in the balancing between text and graphics. Enable Gridlines and Alignment Guides to precisely align objects on the text. Gridlines are not written on the page. You may also choose not to use gridlines and instead align it by eye.
Navigate to View > Gridlines.
In the text, find and choose your graphic. Navigate to the Format tab on the right side of the ribbon. The tab for a selected shape would say Shape Format.
Choose Align > Grid Settings.
Enabling the Snap-to feature, displaying alignment guides, and adjusting the distance between grid lines can all be done through the settings.
4. Divide Your Page for the Fold
Divide the page in half for greeting cards that fold down the middle. Word can be defined in a variety of ways. For our tutorial, we’ll use the line form and center it on the page.

Insert > Shapes > Line is the next step. Draw a vertical line across the center of the page when holding down the Shift key.
Any new content on the page has the potential to nudge this separator. Select the Layout Options button, which is suspended above the selected line, to hold it exactly in the middle.
Select Fix position on-page. Then, Select See more.
Set the Horizontal and Vertical alignments in the Layout settings to correct the position of the line shape.
5. Start Adding Your Graphics
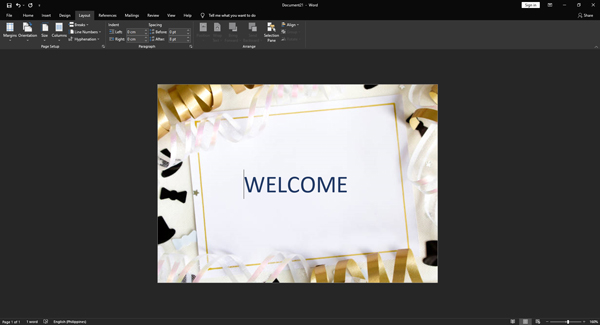
It’s time to incorporate graphics that correspond to the card’s theme. To personalize the card, use free stock images or upload your own. To insert a picture into your book, go to Insert > Pictures. Microsoft Word includes stock images, but it is still preferable to use your own image for a more personal touch.
If you set the image as the backdrop, it will fill the entire page. Select Design > Page Color > Fill Effect from the drop-down menu.
The Picture tab lets you use your own photo or any Creative Commons image found through a Bing Search as a page fill. You can see a preview of it before inserting it into the paper.
6. Choose Beautiful Fonts

The greeting card has its picture. Now, you have to work on the text and other content.
Select Insert > Text Group. You can type text into a Text Box or use Word Art. You don’t have to worry about styling your text because there are many Word Art Styles available.
If you want to use plain text, you must use Shape Fill, Shape Outline, and Shape Effects.
All choices are readily accessible and simple to use from the Shape Format tab on the Ribbon.
Advanced formatting is available for text choices inside a Text Box in Microsoft Word. For example, you might start with a nice font, adjust the font size, and change the font color. Then, pick the Text Box and right-click to bring up the context menu. Select Format Shape to open a sidebar containing all of the Shape and Text Options.
Text Options is further classified as follows:
- Text Fill & Outline
- Text Effects
- Layout & Properties
To decorate your text, experiment with fills, gradients, and transparency. The aesthetic combination will also be determined by the image used as the text’s backdrop.
To make it less distracting, use only one or two typefaces. Also, choose a typeface that represents the event’s mood and format it in the color that better suits the backdrop or graphics. If you can use Microsoft Word to install artistic fonts, not all of them can print well.
7. Preview and Print
With its combination of images, colors, and text, your card is complete. Proof it first on screen, then print it on cheap paper. Examine the text for typos to make sure that all of the elements are properly aligned.
Pay close attention to the margins, as variations can have an effect on the final layout. If you are printing a folding card, check the sample to ensure that the fold is in the correct location and does not cut across a graphic or text.
Print the first greeting card using high-quality stock paper. If you are making several copies, it is often a good idea to check the toner or ink consistency after a few batches.