
Taking screenshots from your iPhone is a convenient way of sharing moments from conversations, game high scores, stills from your favorite videos, bugs you want to report, and basically anything that you see on your screen. Here’s how to take screenshots on your iOS smartphone.
How to Screenshot an iPhone With a Home Button

If you have a new iPhone SE or an iPhone with a home button, press the home button and the sleep/wake button at the same time.
You don’t need to press the keys for a longer period of time. Actually, if you do so, nothing is going to happen. It’s just a quick press. You can hear the sound of a camera shutter from your phone, and a thumbnail sample of the screenshot will softly slide to the bottom corner of your screen.
From there, you can either keep taking screenshots or tap the image to edit and share it.
How to Screenshot an iPhone With Face ID
If you have an iPhone X-style unit, you’ll need to do it a bit different because there’s no home button on it.
Press the volume-up button on the left side of the phone and the sleep/wake button on the right side of the phone at the same time. Again, you don’t have to hold it together at all. It’s a very brief press, and then it’s a release.
Just get the timing correctly, and you’ll see your screen flash followed by a tiny preview shot. If you push the buttons for too long, your iPhone will give you the option to turn off your screen. If you keep holding, you will activate the Emergency SOS feature that automatically calls for help.
As with the iPhones with a home button, you can tap the preview picture of your screenshot to edit and share it.
How to Record Your iPhone Screen
Recording your iPhone screen is amazingly handy, whether you’re reaching a satisfying end to your beloved Apple Arcade game and want to record it, or you’re trying to convince a loved one to go over how to set up a new app. It’s really easy to do, too.
You’re going to need an iOS 11 or later update installed on your iPhone but that’s the only prerequisite.
Before you can start using the new screen recorder tool, you will first need to add the Control Center button. Go to Settings > Control Center > Customize Controls on your iOS device, then press the green plus button next to the Screen Recording button.
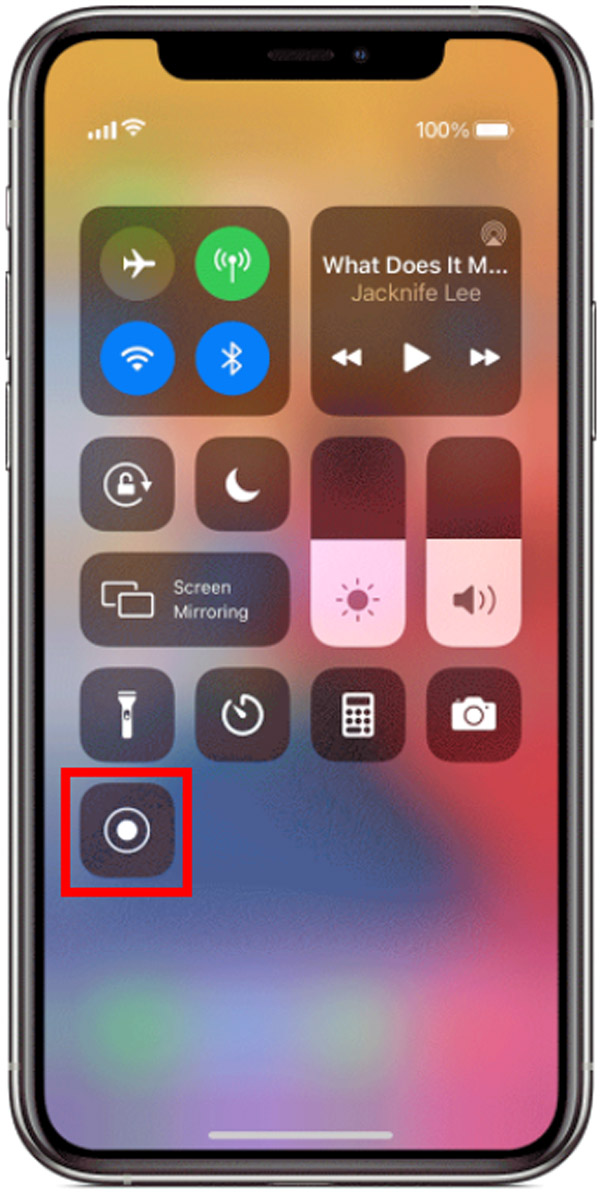
After adding the shortcut, you start by opening the Control Center. On iPhones older than the iPhone X, like the iPhone SE, get there by swiping up from the bottom of the screen. Swipe down from the top-right corner of the screen on the newer iPhones.
Tap the Screen Recording key, which activates a timer inside the button followed by a red one to start capturing whatever is on your screen.
You’ll know when your screen is being recorded since there’s either a red bar at the top of your screen (on older iPhones) or a red highlight behind it (on newer iPhones). Tap the red button or the bar to stop recording.
How to Add Audio to Your Recording
But what if you like to guide someone on how to use a feature or get past a bug you’re always running into? Well, you can turn on your phone’s microphone and record it for as long as the recording session is active.
To switch it on, open the Control Center and press the Video Recording button for a long time. A new menu will appear, with a button to turn your microphone on. Tap the Microphone Audio button, see it turn red, and then select Start Recording.
When you finish filming, you’ll be asked if you want to save your video to the Photos app. Open the Photos app to view, edit, edit, and post your video through Messages, email, or even upload it to your favorite social network.
Apple introduced the ability to capture your screen in iOS 11 a few years back, but iOS 13 and iPadOS 13 brought more significant additions. The new additions included a dark mode, an updated Reminders function, and the ability to prevent all unknown callers from ringing your phone.